By Yoko Kumano
Originally posted on September 9, 2010
My mom used to pack rice balls for me as an elementary school kid for lunch way before the sushi craze swept the nation and way before there were sightings of Alice Waters toting around onigiri. Having these balls of rice wrapped in "black stuff" was actually a source of shame and anxiety for me everyday in elementary school. When the 12 o'clock bell rang for lunch, most were ecstatic about busting into their PB&J sandwiches and partaking in Fruit-by-the-Foot trading sessions. I would dread the fact that when I unzipped my cloth lunch bag, I would get a waft of salt, rice and sea. Because I was already painfully shy to begin with, my lunch consisting of black balls and dried fish pushed me further into being a recluse.
"Ew! Why are you eating black stuff!" my classmates would shout. Confession: I threw away my onigiri sometimes just to avoid the humiliation. I am very sorry Mom.
Years following my elementary school experience, I didn't have a pleasant impression of onigiri - I had reached my quota early on.
It wasn't until I was in college when I visited Japan and its ubiquitous comibini, that I experienced a wonderful reunion with onigiri. Packaged to perfection, and prices at around ¥120, they were efficient and affordable.
Fast forward to the present.
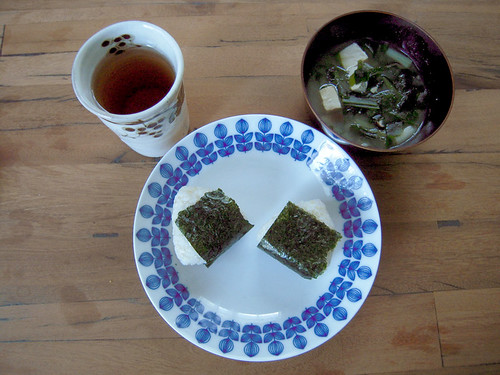
Fall semester started yesterday for my husband, who is currently taking ESL classes. To save money I suggested I would pack a lunch for him. This was a bit monumental for me. I have never packed a lunch for someone other than myself and today I broke that barrier.
I decided to proudly make onigiri.
Ingredients (for about 8 onigiri)
2 cups fresh steamed rice
1 can tuna
3 tbsp Japanese mayonnaise
salt
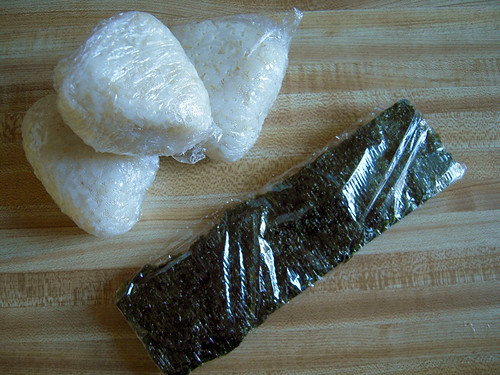
Seaweed
1.
Make rice
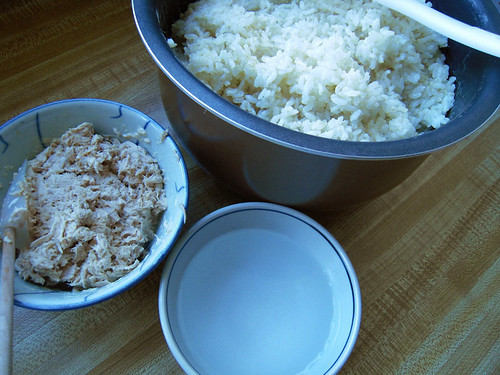
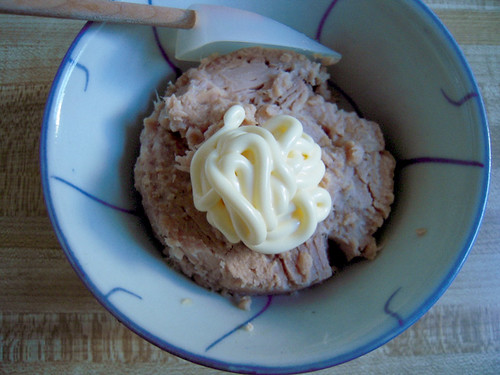
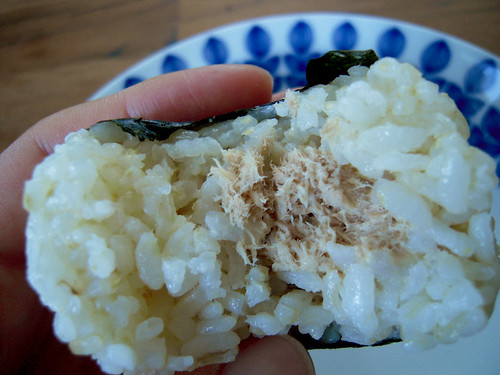
2. Make filling. My filling was canned tuna and kewpie mayonnaise. For one can of tuna, I add about 3 tablespoons of mayonnaise.
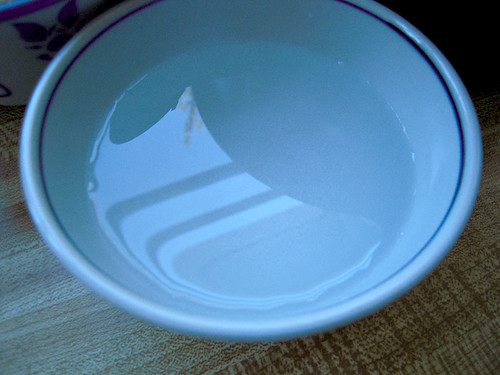
3. Prepare a little bowl full of water and sprinkle in about a teaspoon of salt into it. This bowl of water will be used to wet your hands so rice doesn't stick all over them.
4. Once the rice is done steaming, stir it around so that it cools down so that you can handle it without burning the palms of your hands.
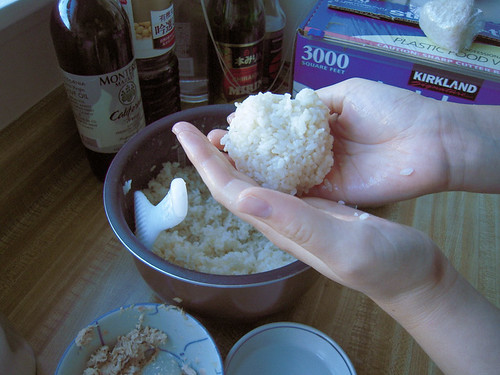
5. Rub plenty of salt on your hands. Grab a handful of rice.
6. Mold into a ball.
7. Press into the middle so that you create a little space that will allow you to insert the filling.
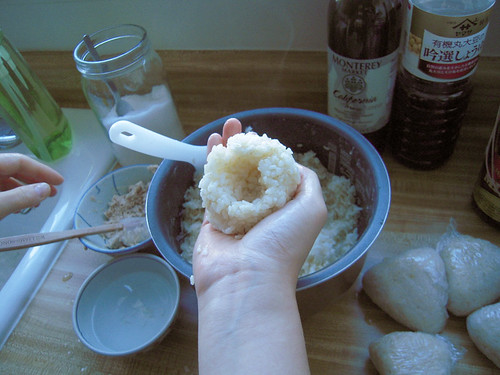
8. Put the filling into the hole.
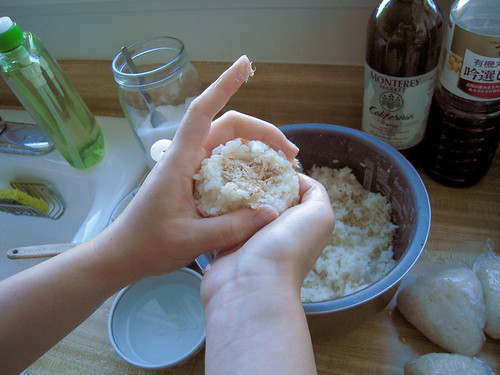
9. Close up the hole the best you can. You might need to pile a little bit of extra rice over the hole to cover it completely.
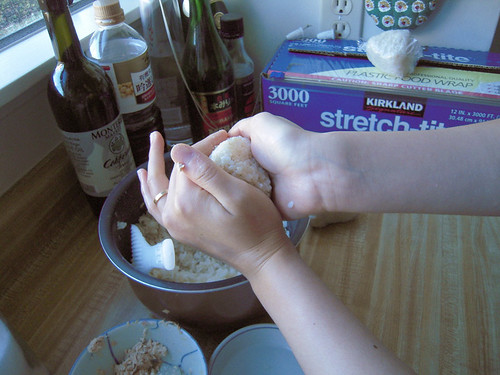
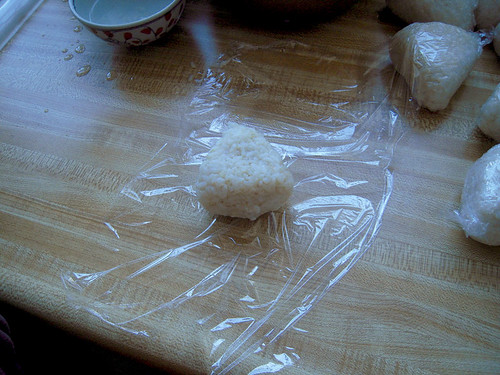
10. Onigiri are usually molded into a triangle shape. Mold the onigiri into a triangle shape by place the ball in the palm of one hand, while using the other hand forming a "V" with your thumb and other fingers in an L shape.
11. Wrap the onigiri in saran wrap.
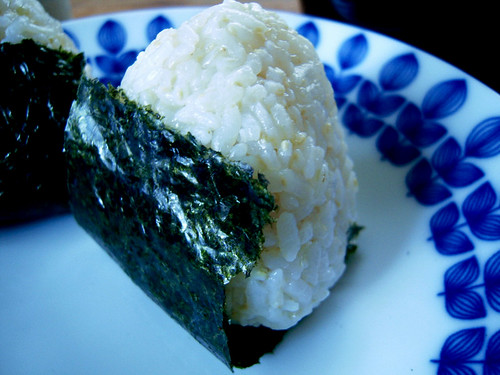
12. When eating, wrap the onigiri in some seaweed. You can wrap it up entirely or do what's shown in the picture at the bottom of the page.

 By Yoko Kumano
Originally posted on September 9, 2010
My mom used to pack rice balls for me as an elementary school kid for lunch way before the sushi craze swept the nation and way before there were sightings of Alice Waters toting around onigiri. Having these balls of rice wrapped in "black stuff" was actually a source of shame and anxiety for me everyday in elementary school. When the 12 o'clock bell rang for lunch, most were ecstatic about busting into their PB&J sandwiches and partaking in Fruit-by-the-Foot trading sessions. I would dread the fact that when I unzipped my cloth lunch bag, I would get a waft of salt, rice and sea. Because I was already painfully shy to begin with, my lunch consisting of black balls and dried fish pushed me further into being a recluse.
"Ew! Why are you eating black stuff!" my classmates would shout. Confession: I threw away my onigiri sometimes just to avoid the humiliation. I am very sorry Mom.
Years following my elementary school experience, I didn't have a pleasant impression of onigiri - I had reached my quota early on.
It wasn't until I was in college when I visited Japan and its ubiquitous comibini, that I experienced a wonderful reunion with onigiri. Packaged to perfection, and prices at around ¥120, they were efficient and affordable.
Fast forward to the present.
Fall semester started yesterday for my husband, who is currently taking ESL classes. To save money I suggested I would pack a lunch for him. This was a bit monumental for me. I have never packed a lunch for someone other than myself and today I broke that barrier.
I decided to proudly make onigiri.
Ingredients (for about 8 onigiri)
2 cups fresh steamed rice
1 can tuna
3 tbsp Japanese mayonnaise
salt
Seaweed
1. Make rice
By Yoko Kumano
Originally posted on September 9, 2010
My mom used to pack rice balls for me as an elementary school kid for lunch way before the sushi craze swept the nation and way before there were sightings of Alice Waters toting around onigiri. Having these balls of rice wrapped in "black stuff" was actually a source of shame and anxiety for me everyday in elementary school. When the 12 o'clock bell rang for lunch, most were ecstatic about busting into their PB&J sandwiches and partaking in Fruit-by-the-Foot trading sessions. I would dread the fact that when I unzipped my cloth lunch bag, I would get a waft of salt, rice and sea. Because I was already painfully shy to begin with, my lunch consisting of black balls and dried fish pushed me further into being a recluse.
"Ew! Why are you eating black stuff!" my classmates would shout. Confession: I threw away my onigiri sometimes just to avoid the humiliation. I am very sorry Mom.
Years following my elementary school experience, I didn't have a pleasant impression of onigiri - I had reached my quota early on.
It wasn't until I was in college when I visited Japan and its ubiquitous comibini, that I experienced a wonderful reunion with onigiri. Packaged to perfection, and prices at around ¥120, they were efficient and affordable.
Fast forward to the present.
Fall semester started yesterday for my husband, who is currently taking ESL classes. To save money I suggested I would pack a lunch for him. This was a bit monumental for me. I have never packed a lunch for someone other than myself and today I broke that barrier.
I decided to proudly make onigiri.
Ingredients (for about 8 onigiri)
2 cups fresh steamed rice
1 can tuna
3 tbsp Japanese mayonnaise
salt
Seaweed
1. Make rice
 2. Make filling. My filling was canned tuna and kewpie mayonnaise. For one can of tuna, I add about 3 tablespoons of mayonnaise.
 3. Prepare a little bowl full of water and sprinkle in about a teaspoon of salt into it. This bowl of water will be used to wet your hands so rice doesn't stick all over them.
 4. Once the rice is done steaming, stir it around so that it cools down so that you can handle it without burning the palms of your hands.
5. Rub plenty of salt on your hands. Grab a handful of rice.
6. Mold into a ball.
4. Once the rice is done steaming, stir it around so that it cools down so that you can handle it without burning the palms of your hands.
5. Rub plenty of salt on your hands. Grab a handful of rice.
6. Mold into a ball.
 7. Press into the middle so that you create a little space that will allow you to insert the filling.
 8. Put the filling into the hole.
 9. Close up the hole the best you can. You might need to pile a little bit of extra rice over the hole to cover it completely.
10. Onigiri are usually molded into a triangle shape. Mold the onigiri into a triangle shape by place the ball in the palm of one hand, while using the other hand forming a "V" with your thumb and other fingers in an L shape.
9. Close up the hole the best you can. You might need to pile a little bit of extra rice over the hole to cover it completely.
10. Onigiri are usually molded into a triangle shape. Mold the onigiri into a triangle shape by place the ball in the palm of one hand, while using the other hand forming a "V" with your thumb and other fingers in an L shape.
 11. Wrap the onigiri in saran wrap.
 12. When eating, wrap the onigiri in some seaweed. You can wrap it up entirely or do what's shown in the picture at the bottom of the page.


Comments (0)
There are no comments for this article. Be the first one to leave a message!