As some of you may remember, I
made umeboshi (pickled plum) last year, while Kayoko & Co. were doing the
same on the west coast. I used yellow plums instead of Japanese plums, while the west coast group used real Japanese plums, but pickled while they were still green and unripe. Both results were ok, but I had to retry it this year.
During the month of June, you sometimes see Japanese plums at Japanese grocery stores. When you do, ask the store people to sell you THE ENTIRE STOCK. I did exactly that. They only had eight 250g packs, and I bought them all.

Then I read many sites about how to make pickled plums, and I followed the rules pretty closely.
Rule of thumb: Never pickle green plums. Wait until they are fragrant, soft (not too soft) and yellow.
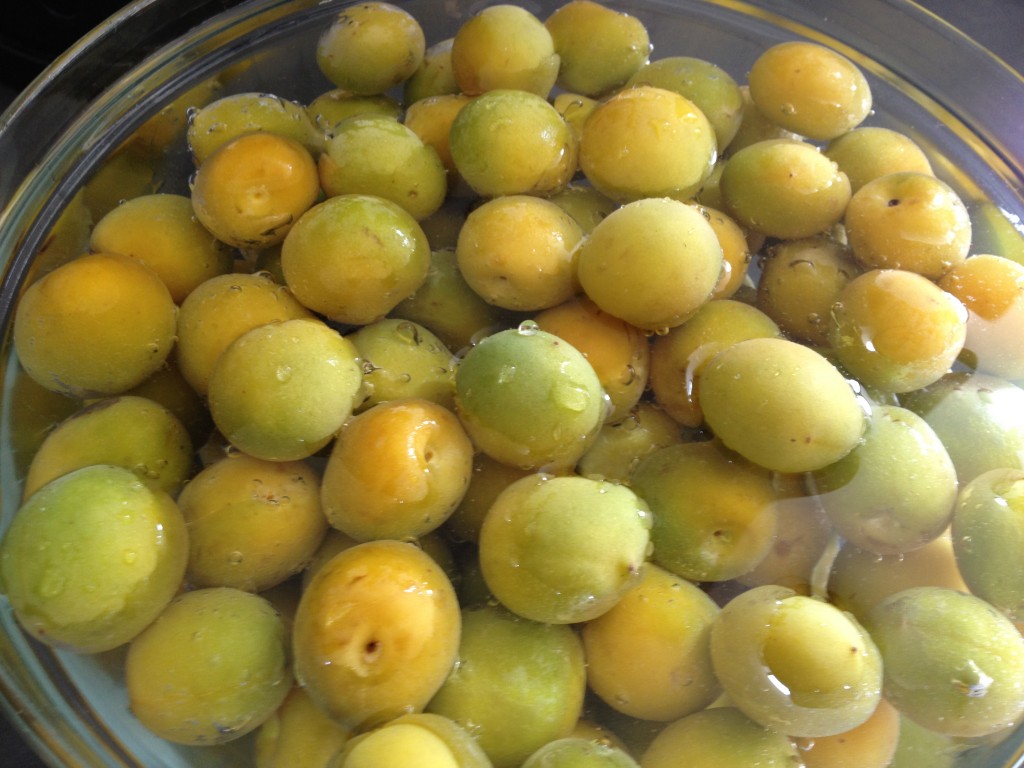
So I waited green plums to turn yellow, and very fragrant. They look green here but they are fragrant and in person they were a lot more yellow than green.

Pickling method is exactly the same as last year. Once you wash them, take out the tips, then wash them in vodka, roll them in salt (2kg of plum, 18% of salt is 360 gram), place them in a container, place a weight on it and set it in cool place for about a month.
In just a couple of days, the liquid (we call it
umezu, which is plum vinegar) will fill up the whole container, and come up above the plums. This is a very good sign of pickling process is going in the right direction.

Fast forward for a month, it's time to dry them. Unlike Kayoko's batch last year, I didn't bother to add red shiso. It does add a cute red tint to plums, but it's pretty difficult to find red shiso, and it's totally not necessary so I omitted it.
One snafu did occur. I used my water weight method by filling ziploc bag with water and placing it directly on top of plums, and of course water leaked out of the bag! I waited and see if it was ok, but mold started to grow. 18% salt is a safe way to avoid grow, but due to the dilution from the weight, mold grew. I took all the plums out, washed them in vodka, strained the liquid, then added a bit more salt. At this point, I have no idea how much salt I put in, but I wanted to make sure that the mold would stop growing.
Over the weekend, I dried them under the strong NYC sun. It's amazing how the power of the sun makes a huge difference in umeboshi-making.
When I took plums out of the container, it smelled fruity/salty, and looked dark yellow.


After one day of drying, it started to shrink a little, and the color was turning a bit more brown. Make sure you turn them so that all the sides get exposed to the sun.

This is after 1 day of drying. It started to shrink, and salt crystals can be seen on outer skins.

Midday day two:

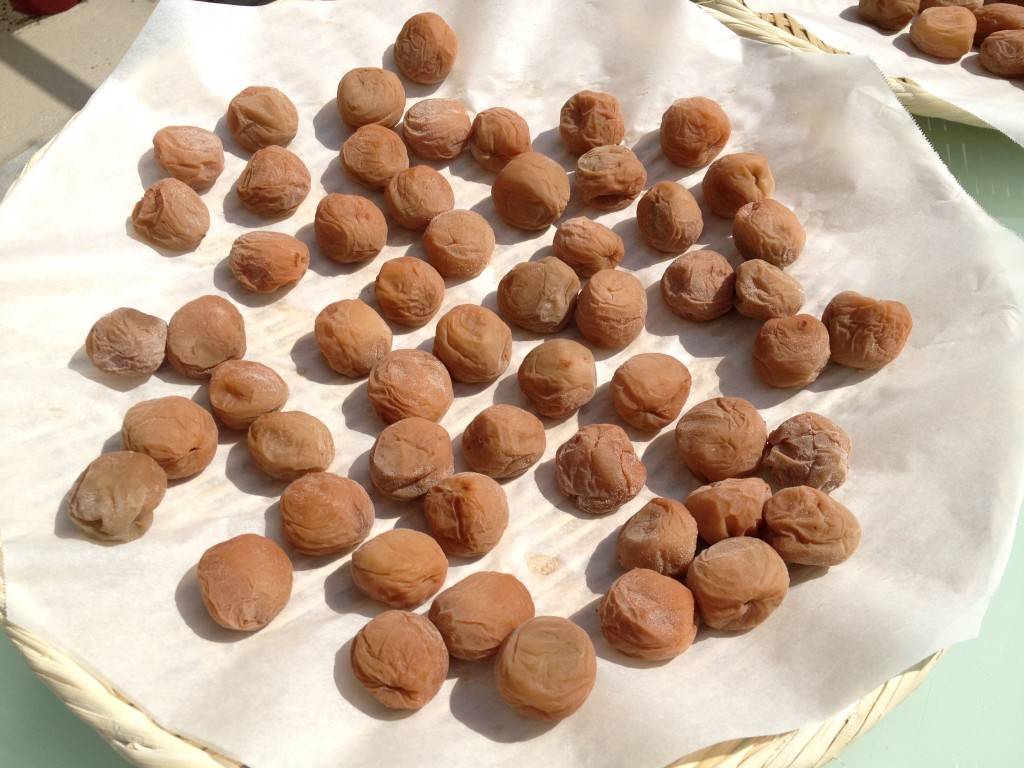
After two days of drying, it looks umeboshi-like, and smells very much like umeboshi.

This is definitely the real deal umeboshi. It's amazing how they turn color from darkish yellow to the pale brown umeboshi color. Nowadays, you can find less salty, sweet kinds of umeboshi at the grocery stores. These are not legitimate for us Wakayamans (Wakayama prefecture is known for its umeboshi, as well as other plum products). It must be salty, and fill your mouth with puckery tartness.
Next year, I will make more, and make sure that the weight isn't directly touching the plums.
This year's umeboshi were definitely a success. You can eat a full bowl of rice with one piece of this baby.
 As some of you may remember, I made umeboshi (pickled plum) last year, while Kayoko & Co. were doing the same on the west coast. I used yellow plums instead of Japanese plums, while the west coast group used real Japanese plums, but pickled while they were still green and unripe. Both results were ok, but I had to retry it this year.
During the month of June, you sometimes see Japanese plums at Japanese grocery stores. When you do, ask the store people to sell you THE ENTIRE STOCK. I did exactly that. They only had eight 250g packs, and I bought them all.
 Then I read many sites about how to make pickled plums, and I followed the rules pretty closely.
Rule of thumb: Never pickle green plums. Wait until they are fragrant, soft (not too soft) and yellow.
So I waited green plums to turn yellow, and very fragrant. They look green here but they are fragrant and in person they were a lot more yellow than green.
 Pickling method is exactly the same as last year. Once you wash them, take out the tips, then wash them in vodka, roll them in salt (2kg of plum, 18% of salt is 360 gram), place them in a container, place a weight on it and set it in cool place for about a month.
In just a couple of days, the liquid (we call it umezu, which is plum vinegar) will fill up the whole container, and come up above the plums. This is a very good sign of pickling process is going in the right direction.
 Fast forward for a month, it's time to dry them. Unlike Kayoko's batch last year, I didn't bother to add red shiso. It does add a cute red tint to plums, but it's pretty difficult to find red shiso, and it's totally not necessary so I omitted it.
One snafu did occur. I used my water weight method by filling ziploc bag with water and placing it directly on top of plums, and of course water leaked out of the bag! I waited and see if it was ok, but mold started to grow. 18% salt is a safe way to avoid grow, but due to the dilution from the weight, mold grew. I took all the plums out, washed them in vodka, strained the liquid, then added a bit more salt. At this point, I have no idea how much salt I put in, but I wanted to make sure that the mold would stop growing.
Over the weekend, I dried them under the strong NYC sun. It's amazing how the power of the sun makes a huge difference in umeboshi-making.
When I took plums out of the container, it smelled fruity/salty, and looked dark yellow.

 After one day of drying, it started to shrink a little, and the color was turning a bit more brown. Make sure you turn them so that all the sides get exposed to the sun.
 This is after 1 day of drying. It started to shrink, and salt crystals can be seen on outer skins.
 Midday day two:
 After two days of drying, it looks umeboshi-like, and smells very much like umeboshi.
 This is definitely the real deal umeboshi. It's amazing how they turn color from darkish yellow to the pale brown umeboshi color. Nowadays, you can find less salty, sweet kinds of umeboshi at the grocery stores. These are not legitimate for us Wakayamans (Wakayama prefecture is known for its umeboshi, as well as other plum products). It must be salty, and fill your mouth with puckery tartness.
Next year, I will make more, and make sure that the weight isn't directly touching the plums.
This year's umeboshi were definitely a success. You can eat a full bowl of rice with one piece of this baby.


Comments (4)
Moto,
I enjoy your work! This project is really fascinating and I am interested in attempting. I worked for a Japanese family restaurant about 13 years ago and immediately became a Japanophile! (I originally wrote Japophile and then I asked myself, “is that derogatory?” So I googled it and saw the Japanophile usage and straightened myself up!) Anyway, it took my salty sweet geared American palette a little while to adjust to all of the clean, clear, and thoughtfully combined flavors of Japan. The salted plum and green tea was just whack to me, and my boss’ mom, who I worked for in the kitchen and taught me the many wonderous ways of Japanese cooking, cuisine, and culture, was probably thinking “what a fucking round eye this guy is putting honey in his ocha!” I don’t have to guess what she was thinking, she basically told me “you are a fucking round eye to be putting honey in your ocha!” She was more like, “Aaaaahh yada Rosskun! How come honey?!!!” After a month or two I was sucking down some ocha straight up and became addicted to the flavor of the tea unadulterated. Later I came to appreciate her stash of umeboshi that she would share with me once in a while when I was feeling the need for that salty-tang in my tea! Around that same time, back in 99’/2000’, the Choya brand plum wine with cylindrical green bottle and actual Japanese plum inside had just became “cool and new” to the restaurant. I loved eating those boozy little guys! Anyway, long story short, my later appreciation for actual umeboshi came in the form of using the paste as a condiment for cucumber stick. Bomb. Such good collisions going on there…the heat of summer, crisp fresh, damn near melon like cucumber and that salty, tangy, luscious plum and shiso paste swirling together as you munch and beat the heat…and desire more drink as a result of the salt! I have come to find out it’s applied in many different ways and it’s become that intriguing ingredient to employ as a surprise in dishes.
Now, my question is…if I can not get Japanese plums is there a variety comparable that would take well to the salting process? Other than the plum in the Choya bottle, which still has a little integrity compared to the umeboshi, I have never experienced a fresh Japanese plum : ( Are they firm and crunchy like the one in the wine? or is that a result of alcohol or maybe manufacturer’s choice of ripeness for the bottling…please tell me, tell me, TELL ME! : ) At your leisure of course! And thank you for your works.
Ross
Hi Ross,
Thanks for your passionate comment. I don’t know if you live in the US, but you can definitely get Japanese plums in a very limited time in June. If you do not have any access to it, I used American yellow plum last year (as link says). Flavor is similar, but texture was completely off. Japanese plums are not plums, they are in apricot family. I don’t have a car, and going to apricot orchard isn’t an option, but if you do, you may want to inquire about getting unripe ones while they are still green, and follow the umeboshi process. Japanese plums when green are very tough, and by making plum wine, they softens during the process. Keep your eyes at Nijiya or Mitsuwa if you are close to it next June.
using a rock to submerge the ume is a full proof option to a bag of H20. steralize it though.
To submerge the ferment and NOT allow air and oxygen to grow molds, I use a large sheet of flexible, clean polyethylene pushed directly onto the plums in a [partially filled ] crock or bucket. The plastic sheet makes an open sack, so fill with water, and that provides a weight to seal the plums. The water squeezes the sheet to the sides of the bucket, preventing air to flow down, but allows CO2 to bubble out of the ferment. Nerdy!